Installing Your Brilliance Glass Whiteboard
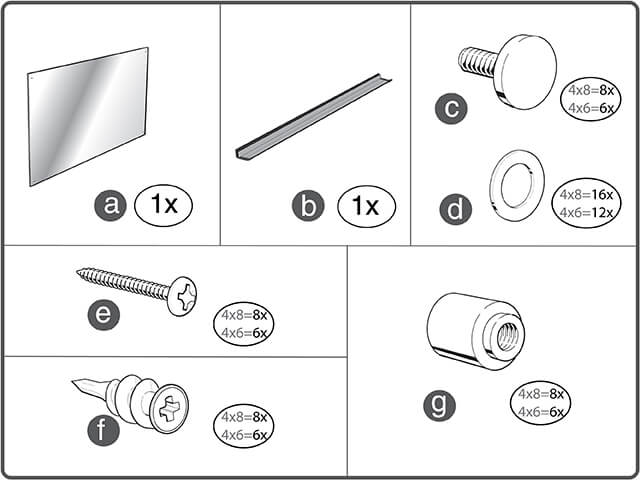
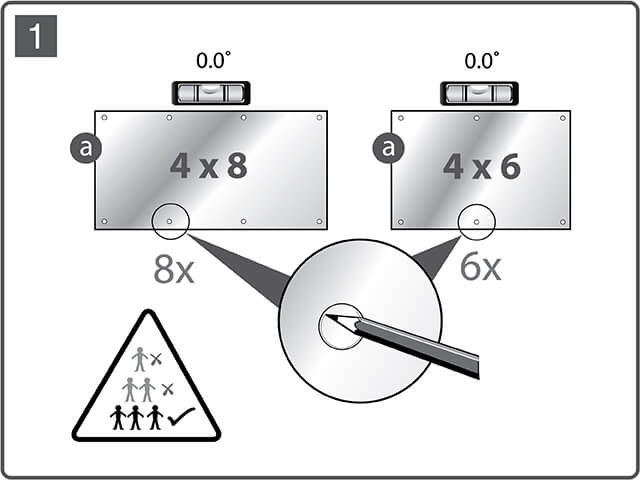
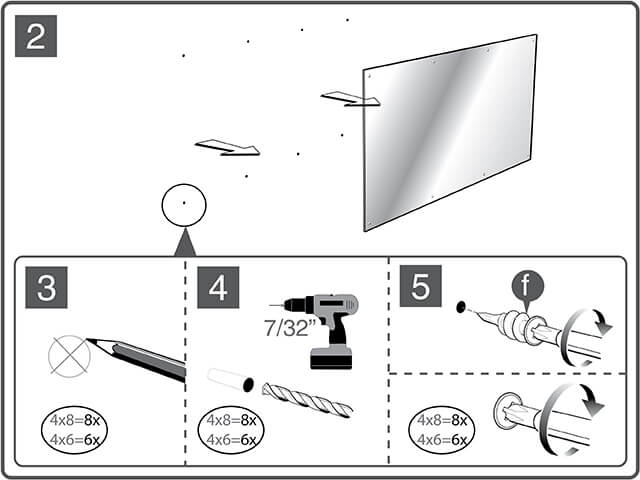
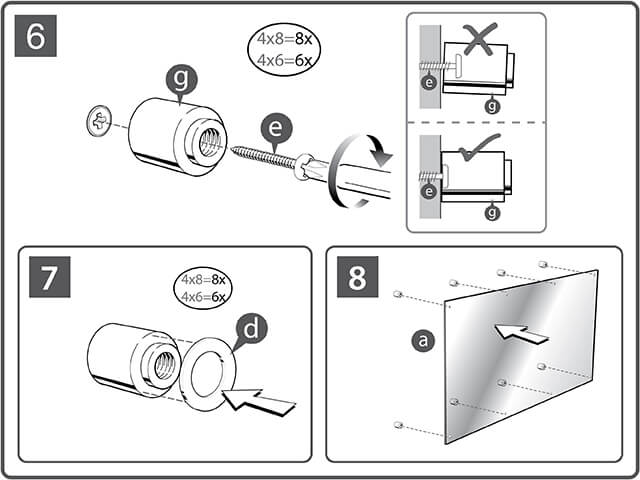
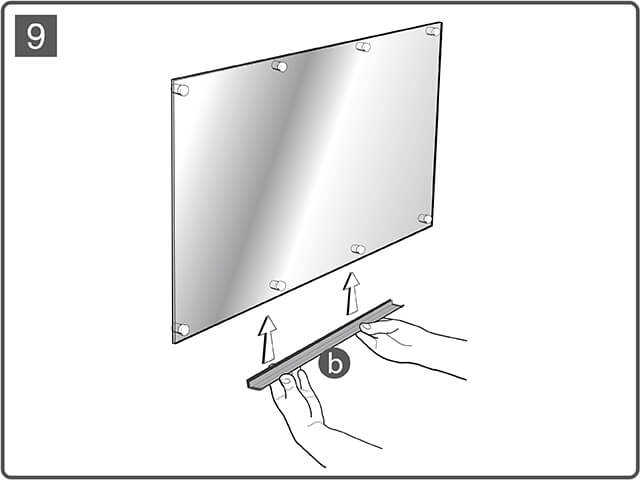
We know you’re excited to start using your Quartet Brilliance Glass Dry-Erase Board! To help you get started, we’ve provided detailed instructions for mounting your glass whiteboard. Please note that instructions may vary depending on the size of your board, but all Brilliance boards will follow the same basic steps.
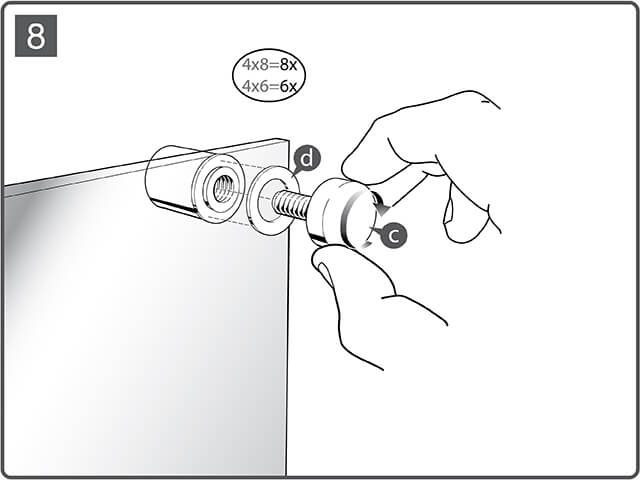
Refer to the chart below to determine how many mounting holes your board has and adjust the steps accordingly.
Size | Infinity SKUs | Mounting Holes |
---|---|---|
24" x 18" | G22418W | 4 |
36" x 24" | G23624W | 4 |
48" x 36" | G24836W | 4 |
48" x 48" | G24848W | 4 |
72" x 48" | G27248W | 6 |
96" x 48" | G29648W | 8 |
What’s Included in the Hardware Kit?
- A) Brilliance Glass Whiteboard
- B) Accessories Tray
- C) Metal Threaded Standoff Caps
- D) Washers (2 Washers per Hole)
- E) Phillips Head Screws
- F) Self-Drilling Drywall Anchors
- G) Metal Threaded Standoffs
What Else Do I Need?
- Pencil
- Level
- Phillips Head Screwdriver
- Power Drill

Step 1– Prepare for Installation
- Make sure you have enough people to install your board. We recommend 2 people for smaller boards and 3+ people for 72" x 48" and 96" x 48" boards.
- Place the Glass Whiteboard (Part A) against the wall in the desired installation location.
- Place a level on top of the board to confirm it is level.
- Use a pencil to mark an “x” in each mounting hole.
- Pro Tip - Only use a pencil when marking the holes. Read our helpful whiteboard installation tips to find out why.

Step 2-5 – Insert Wall Anchors
- Carefully remove the glass whiteboard from the wall and place it in a safe spot.
- Use a 7/32” drill bit to create the pilot hole.
- Insert a Self-Drilling Drywall Anchor (Part F) into each of the “x” marks using a Phillips Head screwdriver. Turn clockwise until the head of each anchor is flush with the wall.

Step 6 – Install Standoffs
- Place a Standoff (Part G) over each drywall anchor. Insert a Phillips Head Screw (Part E) through the standoff, into the anchor and tighten.
- The screw should hold the standoff tightly against the wall, repeat this process for all standoffs.
- Make sure all standoffs are flush against the wall before proceeding.

Step 7-9 – Install Glass Board
- Place Washers (Part D) on the threaded section of each metal Standoff Cap (Part C). Lift glass whiteboard and align holes with the Standoffs (Part G) on your wall.
- Once all washers are in place: Insert Standoff Caps (Part C) through the whiteboard and into the Barrels (Part G).
- Turn caps clockwise until they are almost tight against the glass dry erase board. Repeat steps for all standoffs.
- Fully tighten Standoff Caps once they are all in place.
Make sure the standoffs are flush against the board surface.

Step 10 – Attach Accessory Tray
- Starting at an angle, press the Accessories Tray (Part B) up along the bottom of the glass whiteboard.
- The glass should fit between the gap in the back channel of the tray.
- Push the tray up until the bottom of the back channel is fully against the glass.


Present With Clarity
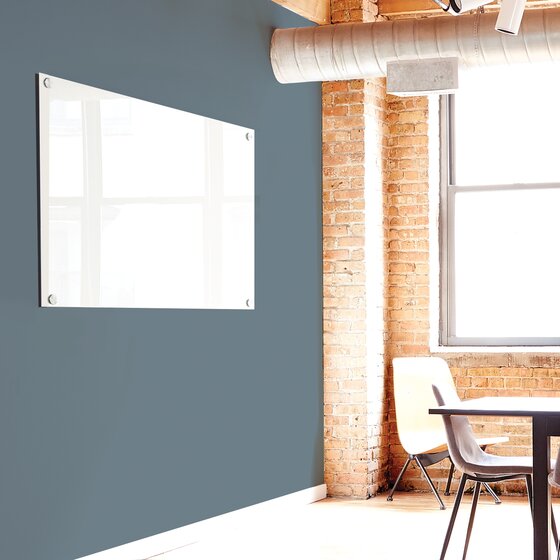
You’re ready to start using your new dry-erase board! The durable, tempered glass surface with its vivid, high-contrast glass is the perfect canvas for all of your ideas . Use Quartet dry-erase markers to capture every brainstorm, take notes and come up with your best idea yet.
Have More Questions?
If you have further questions, please feel free to contact us. You can also find more information about this board by visiting our Quartet Brilliance Glass Dry-Erase Board page or by downloading a copy of your manual.