Free Shipping

Free shipping on orders over $50. Promo applied at checkout.

Skip to Content Skip to footer

Suggestions

  • No Suggestions

Site Pages

Chevron Icon
Results

Free shipping on orders over $50. Promo applied at checkout.

Installing Your InvisaMount Glass Whiteboard

Our Quartet InvisaMount Glass Dry-Erase Boards are one of our most popular glass board options. These magnetic boards come with a hardware kit and installation instructions to get you started, but if you need further assistance, we're here to help!


The following instructions apply to the items listed below. Please note that these boards can only be installed horizontally.

Size InvisaMount SKU
39" x 22" G3922IMW
50" x 28" G5028IMW, G5028IMB
74" x 42" G7442IMW, G7442IMB
85" x 48" G8548IMW, G8548IMB

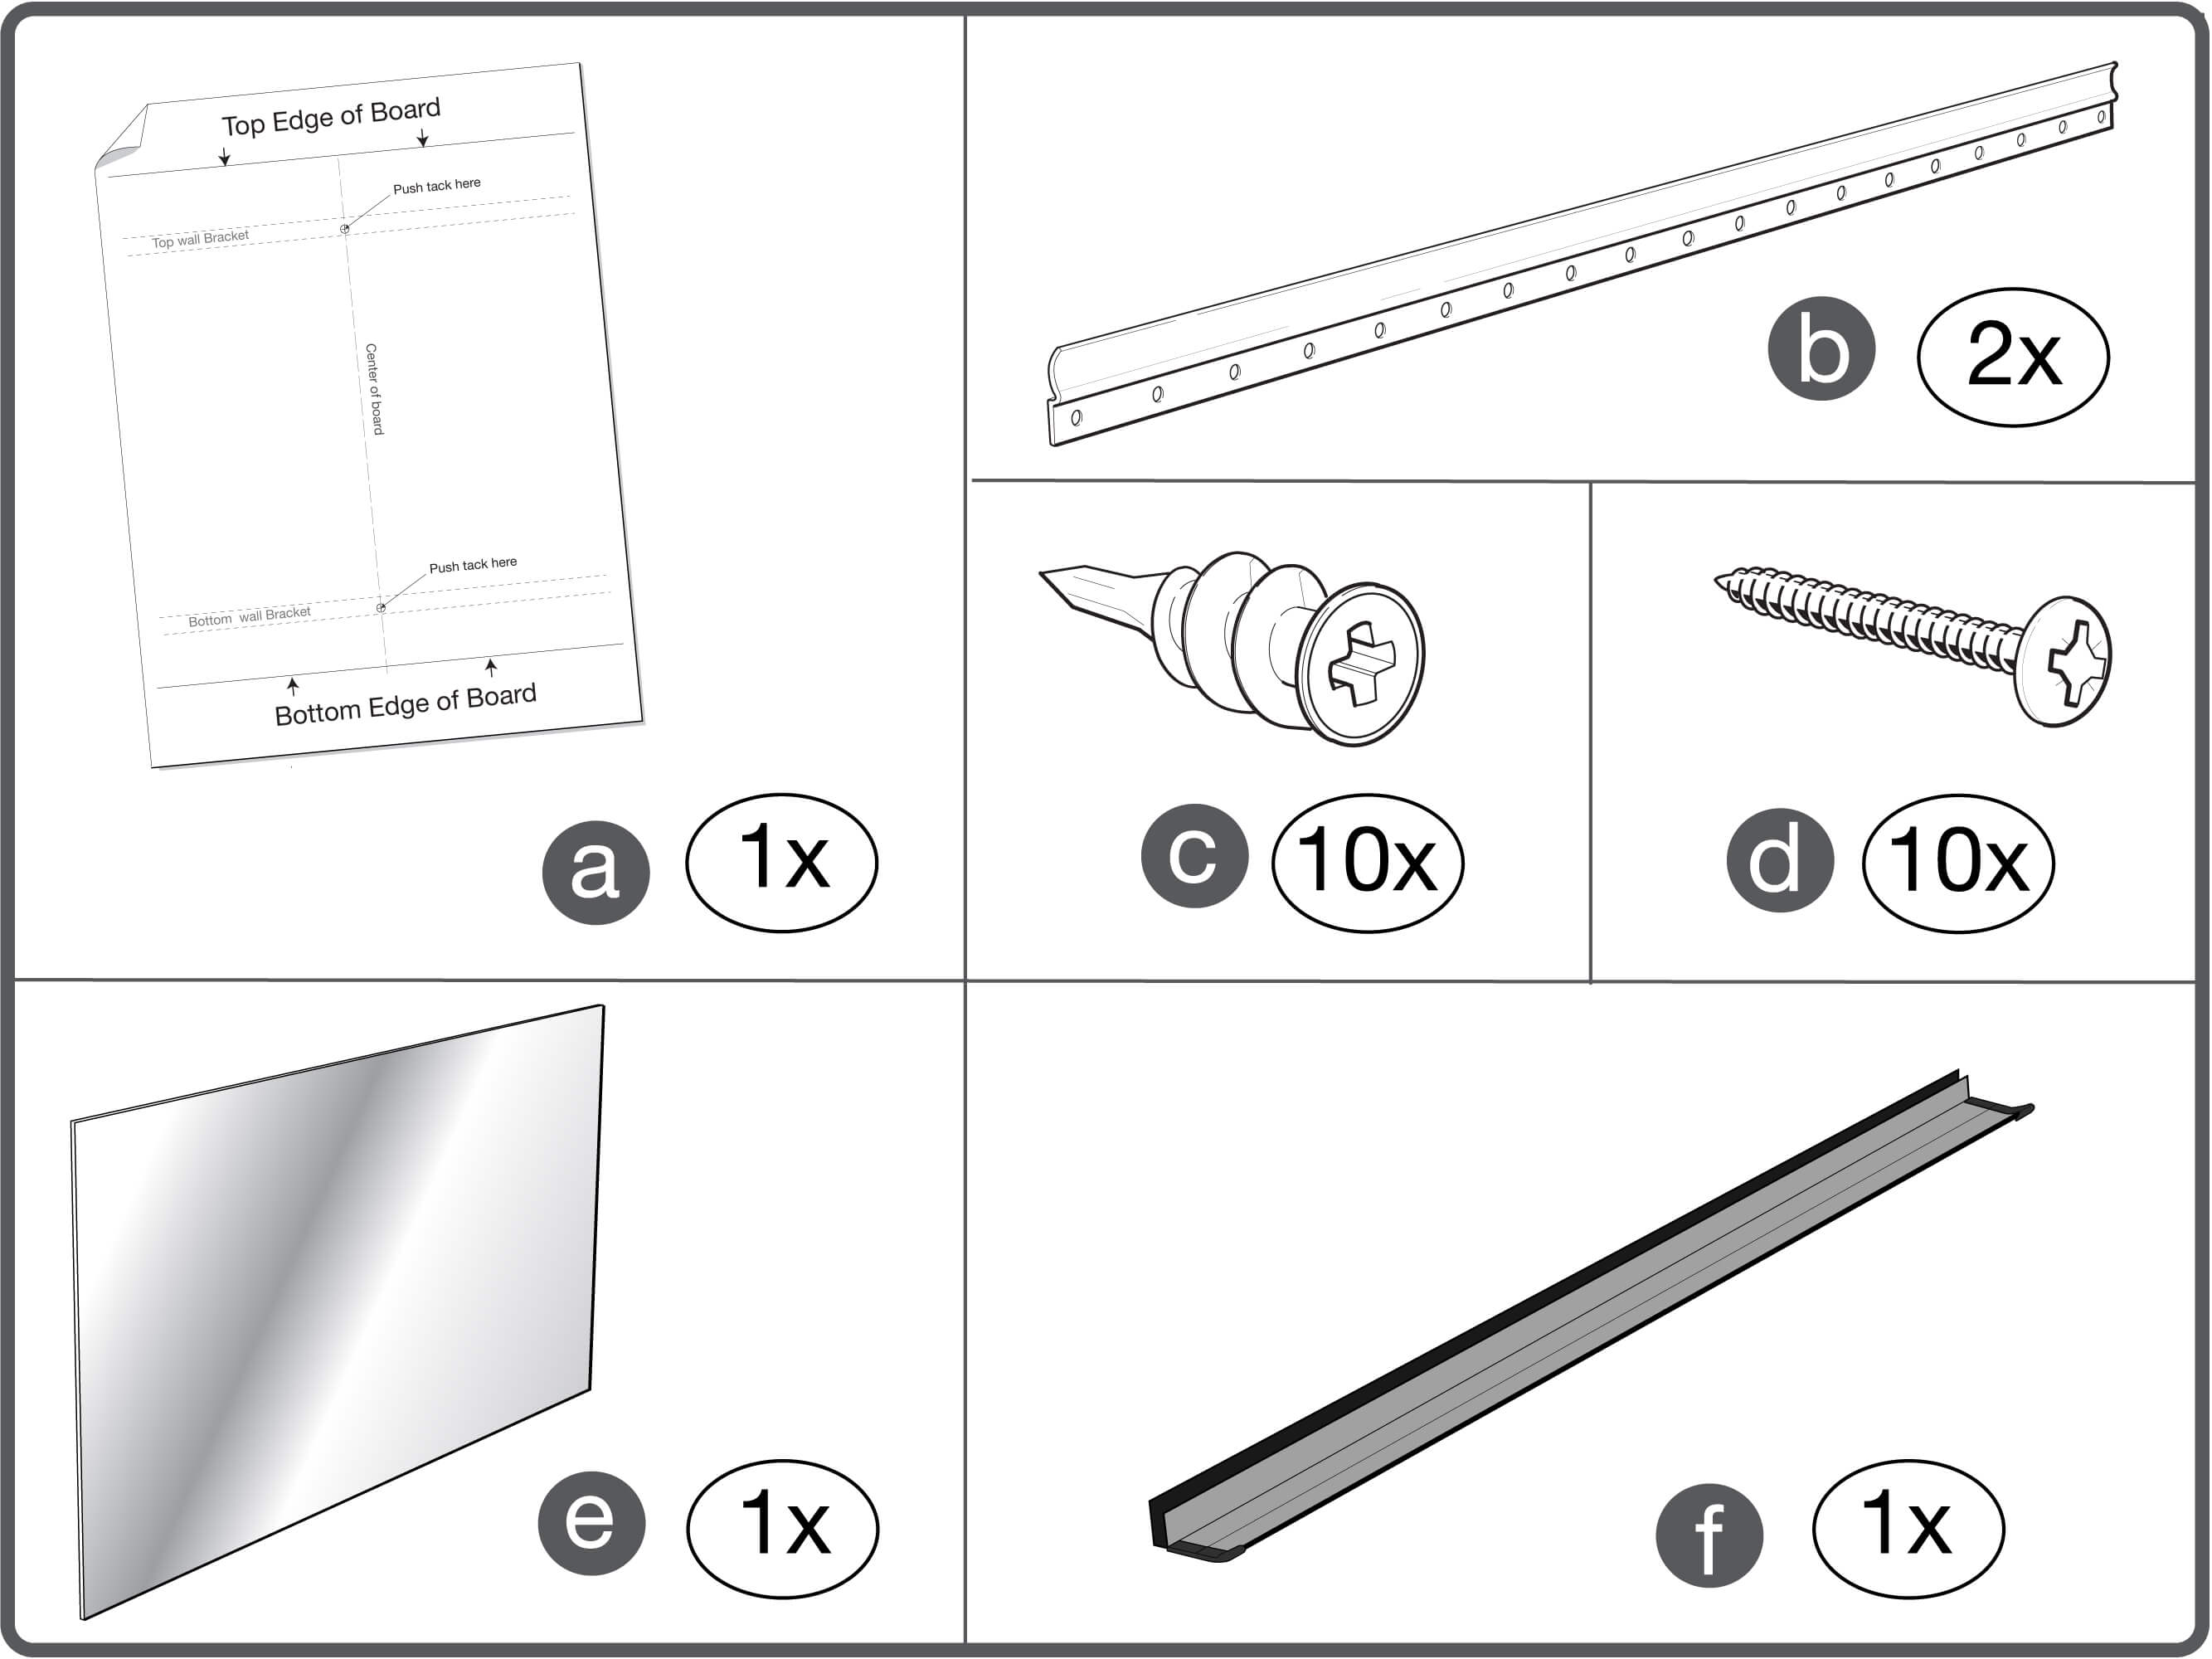
What's Included in the Hardware Kit?

  • A) Paper Installation Template
  • B) Wall Mount Brackets
  • C) Self-Drilling Drywall Anchors
  • D) Phillips Head Screws
  • E) InvisaMount Glass Whiteboard
  • F) Accessory Tray 

What Else Do I Need?

  • Tape - make sure it's safe for the wall
  • Push Pin
  • Phillips Head Screwdriver
  • Level
  • Pencil
  • Power Drill
Invisamount Glass Board Parts

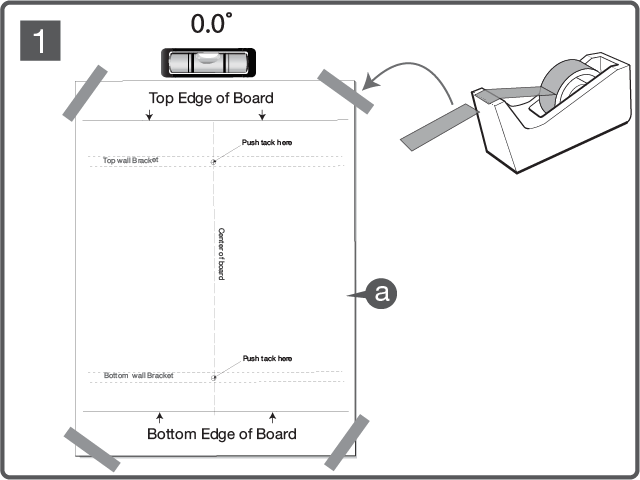
Step 1– Set up the Template

  • Use tape to align the Paper Installation Template on your wall.
  • Place level on “Top Edge of Board” line to confirm template is level.
  • Note: The paper template is not the size of the full glass dry-erase board – it is only used to help align the top and bottom of the board.
Invisamount Glass Board 1

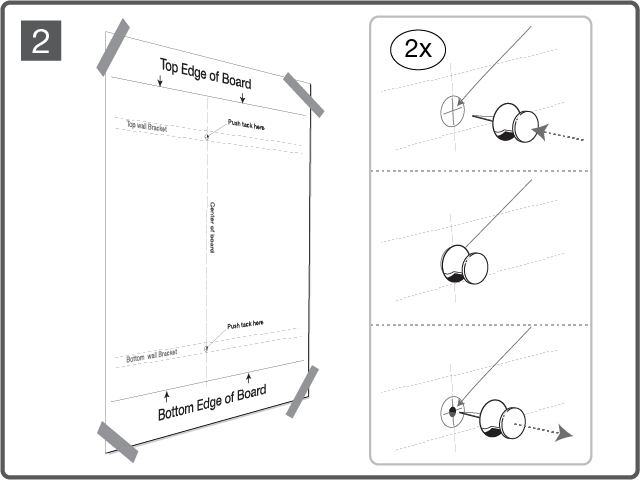
Step 2 – Mark the Wall

  • Locate the “Push tack here” spots at the top and bottom of the template.
  • Use a push pin to mark these spots.
  • Remove the push pin.
Invisamount Glass Board 2

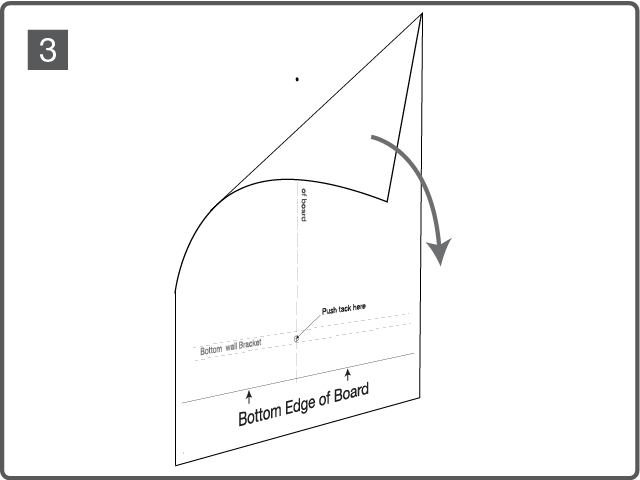
Step 3 – Remove the Template

  • Carefully remove the Paper Installation Template from the wall.
  • Store the template somewhere safe for future use.
invisamount-glass-board-3

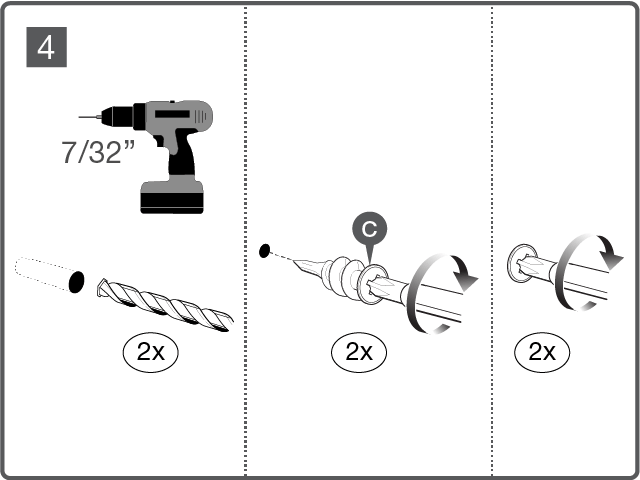
Step 4 – Insert Wall Anchors

  • Use a 7/32” drill bit to create a pilot hole.
  • Use a screwdriver to insert Wall Anchors.
Invisamount Glass Board 4

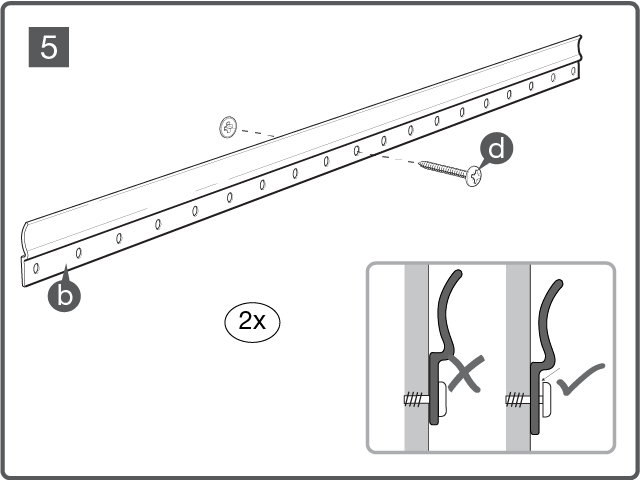
Step 5 – Mount Wall Brackets

  • Find the center hole on the Wall Mount Bracket (Part B) and place it over the top anchor, with the holes toward the bottom of the bracket.
  • Use a screwdriver to insert a screw through the Wall Mount Bracket and into the anchor.
  • Repeat these steps for the bottom bracket.
  • Note: Do not screw the screw all the way into the anchor. There should be a small gap between the Wall Mount Bracket and the head of the screw.
Invisamount Glass Board 5

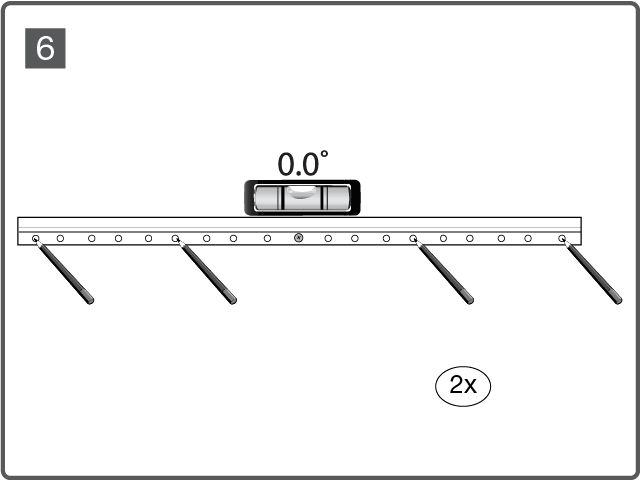
Step 6 – Mark Additional Holes

  • Use a level to make sure the Wall Mount Brackets are even.
  • Use a pencil to mark where additional anchors will be placed.
  • Mark the holes at each end of the bracket and in between the middle and end marks.
Invisamount Glass Board 6

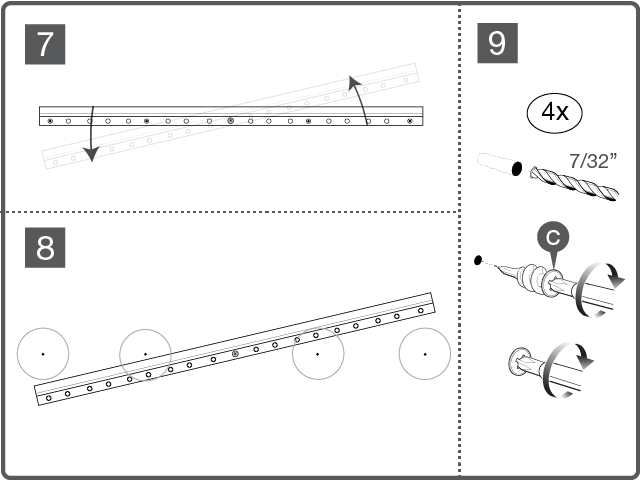
Steps 7 and 8 – Rotate Bracket

  • Rotate bracket to expose pencil marks.


Step 9 – Insert Remaining Anchors

  • Use a 7/32” drill bit to create pilot holes.
  • Insert a Self-Drilling Drywall Anchor (Part C)
    into each mark using a screwdriver.
  • Turn clockwise until the head of the anchor is flush with the wall.
Invisamount Glass Board 7

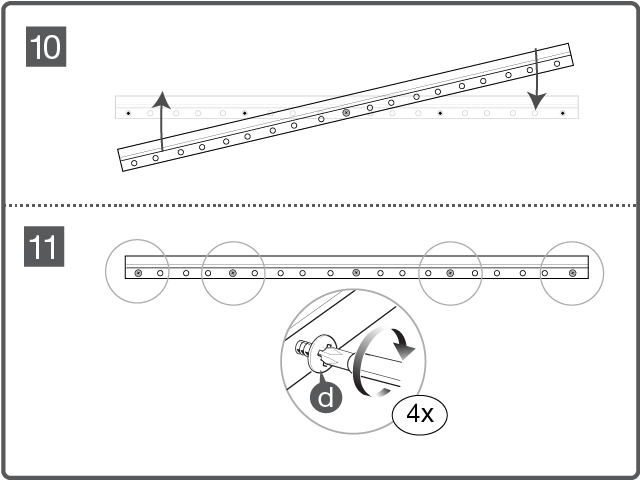
Steps 10 and 11 – Insert Remaining Screws

  • Roate the Wall Mount Bracket back to level.
  • Insert screws through the Wall Mount Bracket and into the anchors.
  • Turn the screws clockwise to tighten.
Invisamount Glass Board 10

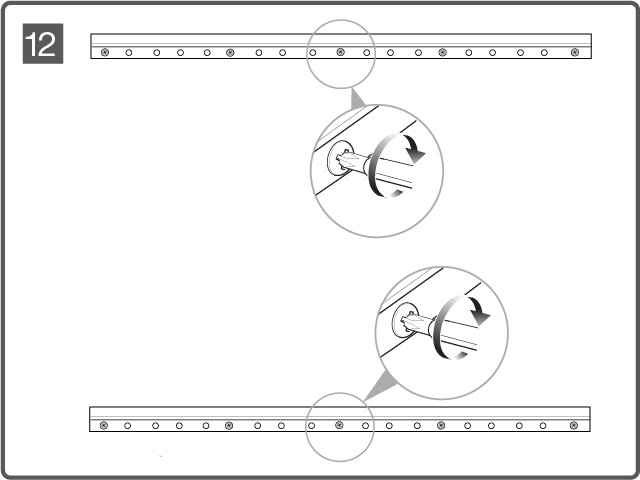
Step 12 – Tighten Center Screws

  • Go back and tighten the center screws so they are flush to the wall
Invisamount Glass Board 12

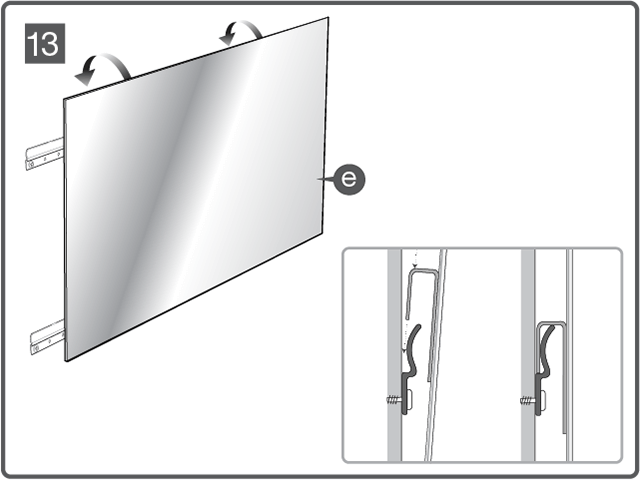
Step 13 – Place Board on the Brackets

  • Lift your InvisaMount Glass Dry-Erase Board against the wall, slightly higher that the Wall Mount Brackets
  • Once lined up, slide the glass board down until the attached mounting clips slide into place behind the Wall Mount Brackets
  • Note: Clips should slide in at the same time for both the top and bottom Wall Mount Brackets
Invisamount Glass Board 13

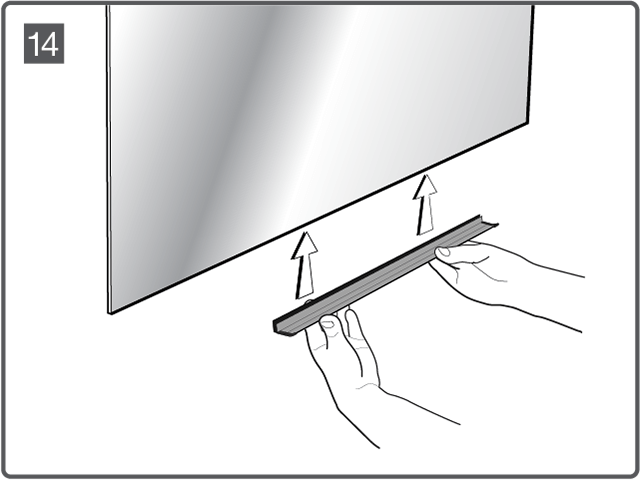
Step 14 – Attach Accessory Tray

  • Starting at an angle, press the Accessories Tray up along the bottom of the glass whiteboard.
  • The glass should fit between the gap in the back channel of the tray.
  • Push the tray up until the bottom of the back channel is fully against the glass.
Invisamount Glass Board 14
invisamount glass whiteboard mounting

Start Collaborating

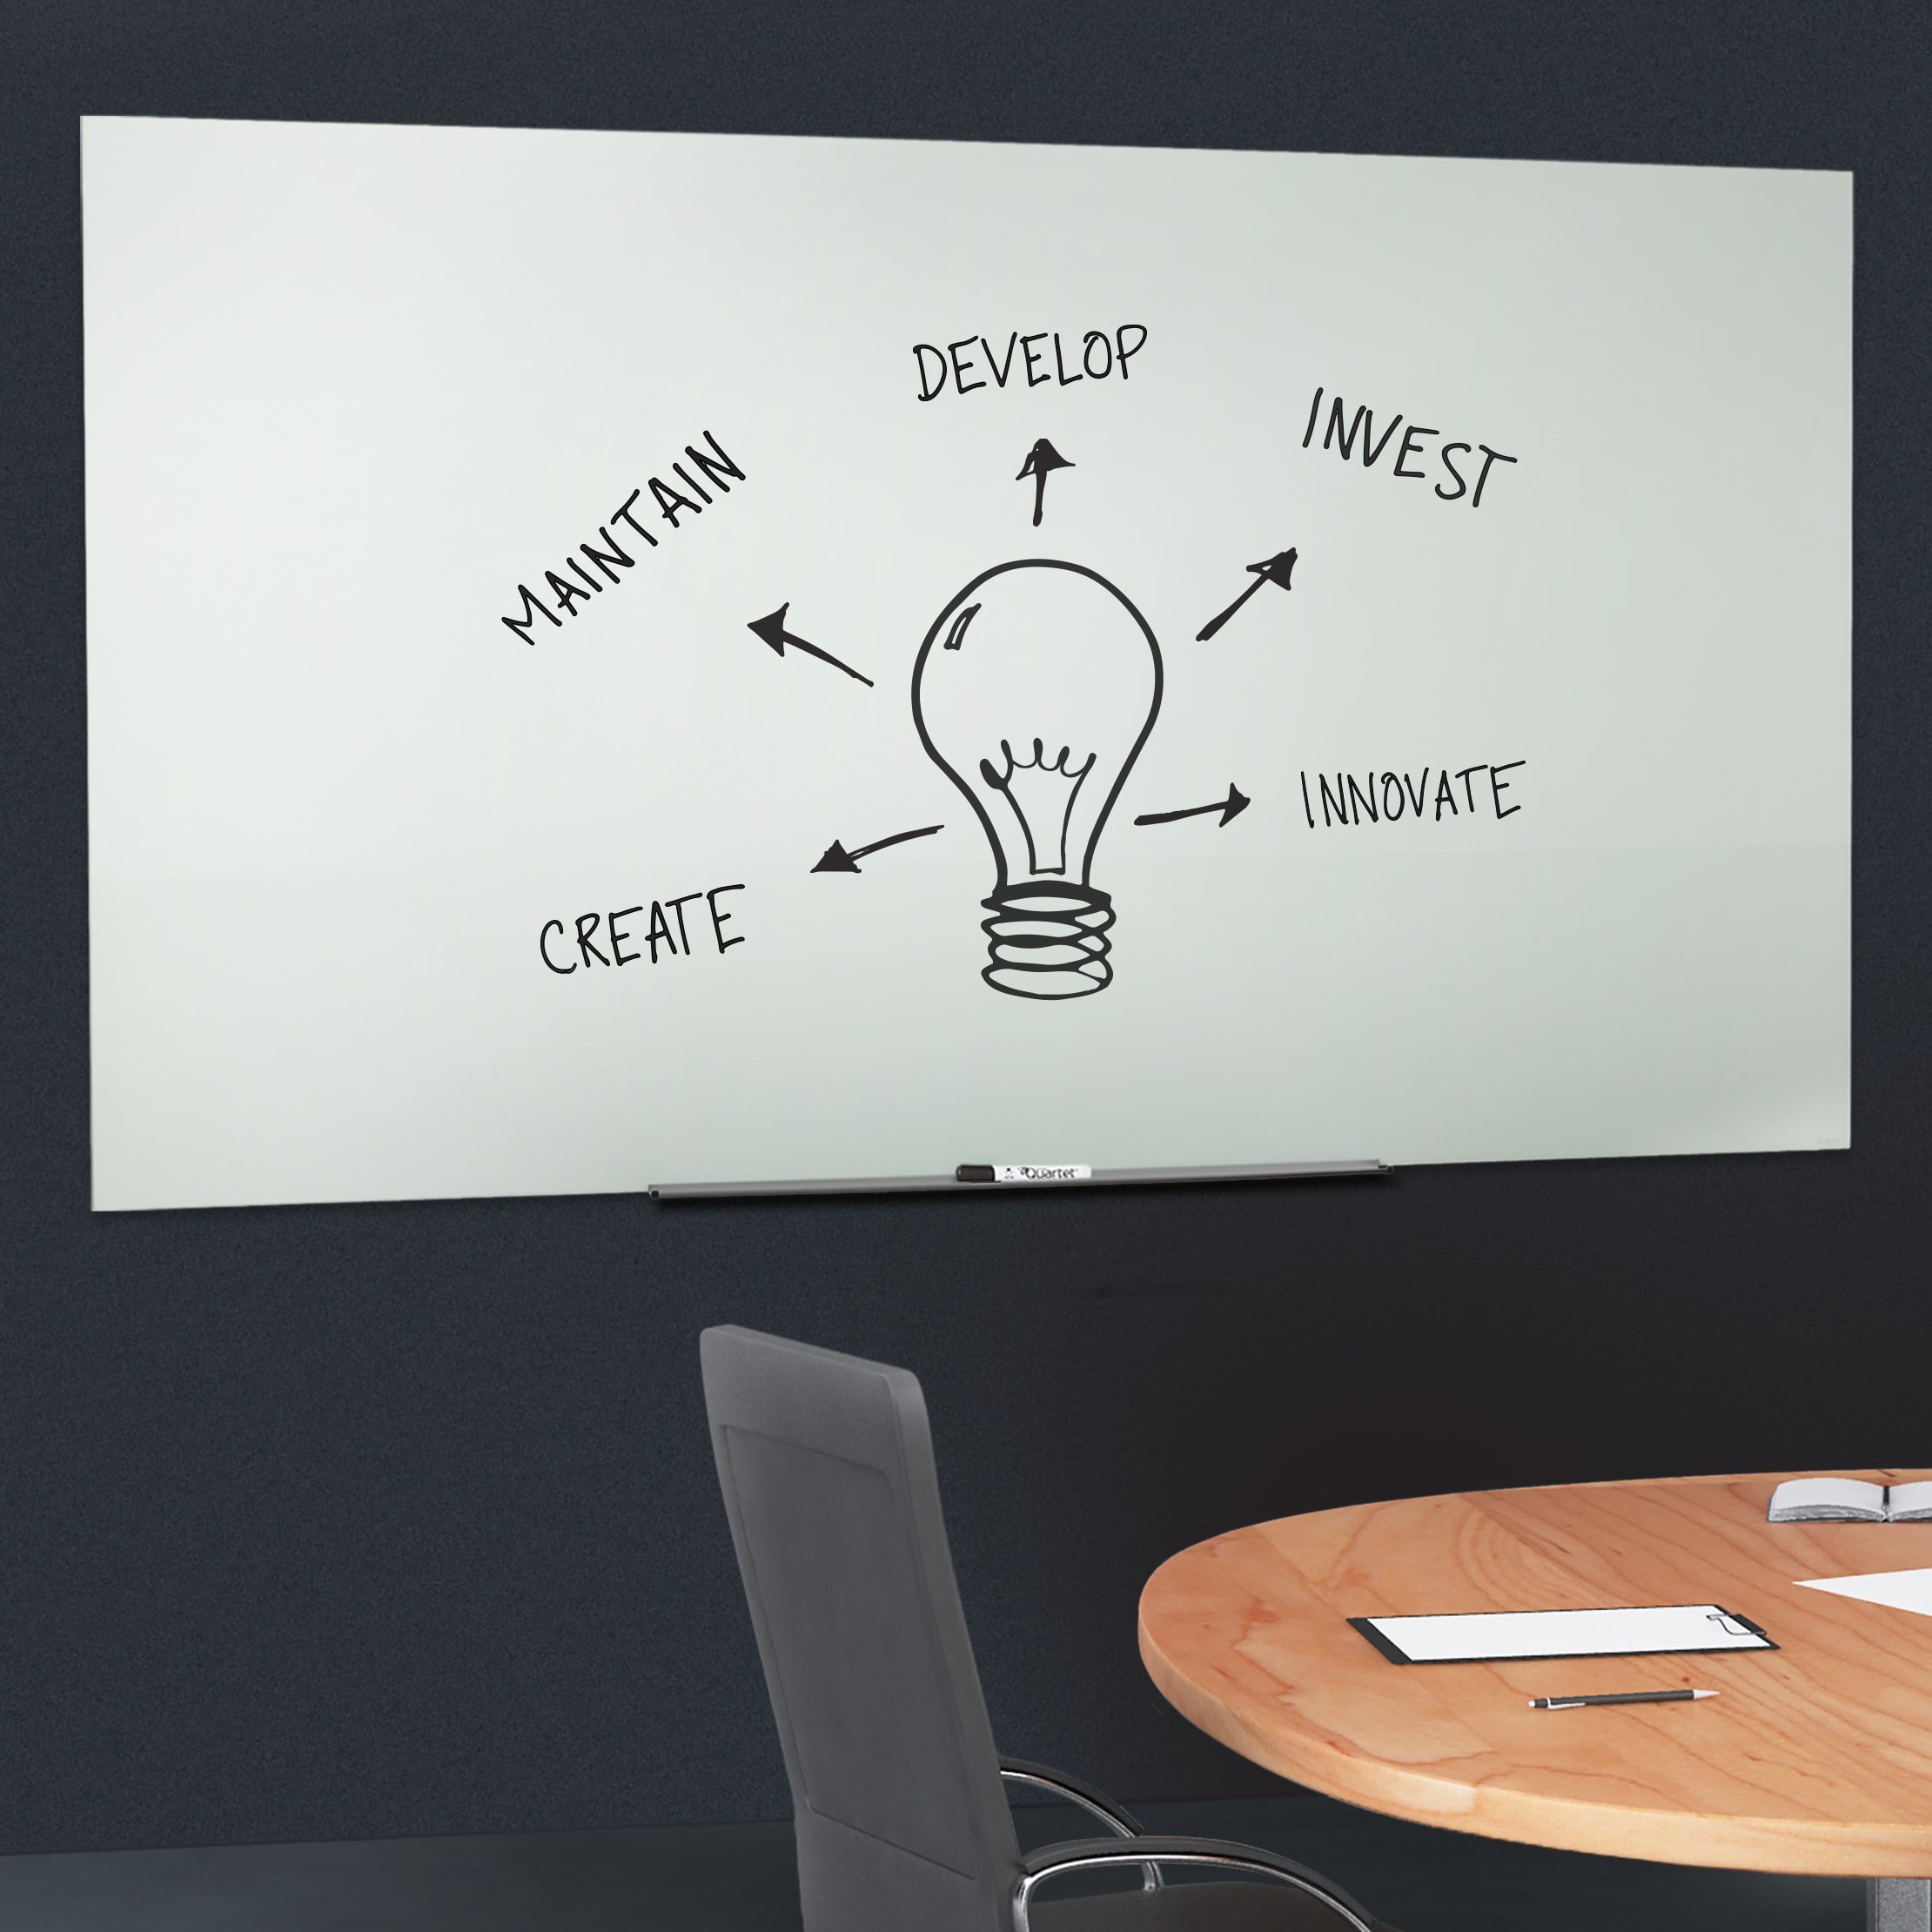
You’re ready to start using your new magnetic dry-erase board! The durable, tempered glass surface is the perfect canvas for all of your ideas. Use Quartet dry-erase markers to capture every brainstorm, take notes and come up with your best idea yet.

Have More Questions?

If you have further questions, please feel free to contact us. You can also find more information about this board by visiting our Quartet InvisaMount Glass Dry-Erase Board page or by downloading a copy of your manual.